Thursday, March 10, 2011

A BOWL OF GRANDMA'S SOUP

I've admitted this before, and I'm sure I'm not alone, but I'll go through phases where I'll eat the same thing for several days in a row.  I'm not saying this is bad, just recognizing this is a pattern for me.  So after making a beet salad last week, I thought it'd be fun to then make a beet soup this week: Borscht.

My father's mother was Ukrainian and she made borscht all the time.  There are always different versions of borscht, so I invite you to play around with the ingredients, adding more or less of whatever you fancy.  One thing stays the same though; wear dark clothing when handling beets.  And pomegranates, for that matter.  Here's the recipe I used:

Ukrainian Borscht

8 servings
You will need:
2 Ham hocks

1 1/2 lb Beef brisket or chuck, fat trimmed

3 qt Beef broth *
2 cups water
3 Bay leaves
10 Peppercorns

5 Allspice berries
3 dashes Caraway Seed

5 medium Beets, roasted, sliced into sticks **
4 TB Red wine vinegar

1/2 cup tomato purée
2 TB Sugar

2 TB Unsalted Butter

1 medium Brown Onion, diced 

1 Red Bell Pepper, diced

2 small Carrots; shredded
5 small boiling Potatoes, cut into large cubes
1 head Cabbage, stalk cut out then shredded

1/2 lb Kielbasa – (to 1 lb), sliced

1/4 cup Kvass ***(I used 1/2 cup Pilsner Urquell beer), or Vinegar or Lemon Juice
1/3 cup snipped fresh Dill

6 Garlic Cloves, minced fine

Dill Sprigs and Sour Cream for garnish


In a large pot, combine meats with broth and water, bay leaves, peppercorns, allspice and caraway seed.  Bring to a boil over high heat then reduce heat to low and simmer, partially covered, skimming frequently, for 2 to 2 1/2 hours.
Strain soup, reserving broth and meats separately. Remove meat from the ham hocks, discarding any gristle or bone and cut into dice. Cut beef into large dice. Return meat and broth to pot and add vinegar, tomato purée and sugar.  Simmer, covered, for 15 minutes.

Meanwhile, in a skillet set over medium heat, melt butter.  Sauté onion and red pepper for about 3 minutes; then add carrots, and sauté until vegetables are softened, about 2 minutes.  Season to taste with salt and pepper; add to pot.


Add potatoes and shredded cabbage to pot; simmer for 5 minutes.  Add sliced kielbasa to pot and simmer another 5 minutes.  


Carefully fold in beets.  


Add minced garlic and fresh dill, 


along with the kvass.  


Let simmer, uncovered, for about 3 minutes.  Turn heat off and let stand 10 minutes to allow flavors to blend.  Dish into bowls and garnish with dill sprigs and sour cream. Serve with rye bread if you'd like and enjoy!


Note: The order of adding vegetables to the soup is very important as you do not want to over cook them.  Also, when boiling vegetables, it’s best to cook them on a steady low boil because a rapid boil (high heat) can cause them to collide and break apart.

*The soup may be a bit salty from the ham hocks, so you may need to add more water to taste.

**The beets can be roasted, skin on, for an hour at 400 degrees.  When roasting, wrap in aluminum foil after seasoning with olive oil, salt and pepper.  The foil should be tightly sealed so heat can’t escape.  After an hour, take them out of oven and let rest for15 minutes before peeling off skin.  Be careful, since beets stain.  You may want to use gloves or just buy pre roasted beets at Trader Joe’s!

***Kvass is a fermented, mildly alcoholic drink made from rye bread that is very popular in Russia. You can substitute Kombucha for the Kvass, or whatever beer you have in your fridge.


M and M's Grandma

Wednesday, March 9, 2011

(ALMOST) SUMMERTIME MEAL

After dealing with some on and off rain for the last couple of weeks, it makes a warm sunny day feel that much sweeter! It was 70 degrees yesterday in Los Angeles and it’s supposed to get up to 76 degrees today. Days like this make me feel like a kid again; stupidly giddy at the thought of summertime. Which is why, last night, I decided I was going to pretend like it was summer and eat dinner outside on my balcony. (Unfortunately, we have a few more days until daylight savings so it was a little darker out than I would have liked). Fresh salmon burgers and an arugula salad, paired with one of my favorite Sauvignon Blancs made for an excellent (almost) summertime meal.

Fresh Salmon Burgers
Serves 4

1 pound skinless salmon fillet, cut into ¼ inch pieces
4 green onions, chopped
2 teaspoons jarred jalapenos, chopped
1 tablespoon fresh lemon juice
1 ½ teaspoon Dijon mustard
1 ½ teaspoon prepared horseradish
½ teaspoon salt
½ teaspoon pepper
2 ½ tablespoons of mayonnaise

½ cup dry breadcrumbs
1 teaspoons of olive oil

4 whole wheat buns, lightly toasted
4 large tomato slices
4 rings of sliced red onion
8 small romaine leaves (I love the added crunch romaine gives the burger!)

Lemon Aioli
2 tablespoons of mayonnaise
2 teaspoons of lemon juice
1 clove of garlic, minced
dash of salt

Combine first set of ingredients in a large bowl. Cover and refrigerate for 30 minutes, or depending on how much time you have, place in freezer for 8 minutes.

Combine breadcrumbs and 1 teaspoon of olive oil in a small bowl and then add to large bowl of salmon mixture. Mix well. Form salmon mixture into 4 patties. It’s important to make sure that each patty is as tightly packed together and as flat as possible on both sides so they do not break apart when cooking.

Heat 1 tablespoon of olive oil in a large skillet over medium high heat. Add patties and cook about 3 minutes per side until brown and crispy on the outside.

To make lemon aioli, mix mayonnaise, lemon juice, garlic, and salt in a small dish until thoroughly combined.

To assemble burgers, spread lemon aioli generously on top and bottom buns. Place salmon patties on bottom bun, top with tomato slice, red onion, and two romaine leaves. Place top bun on top of romaine leaves and go to town!


Arugula Salad with Lemon and Shaved Parmesan
Serves 4

3 ½ oz of arugula (I used about half of a 7oz bag)
20 shavings of parmesan cheese (I use a vegetable peeler that works great on cheese …I count about 20 shavings, then break them up into smaller pieces)

Lemon Vinaigrette
1 tablespoon of lemon juice
2 tablespoons of extra virgin olive oil
dash of salt

Place arugula in large mixing bowl, add parmesan shavings. Mix lemon vinaigrette in a small dish, then add to arugula and parmesan. Toss to coat, and serve!


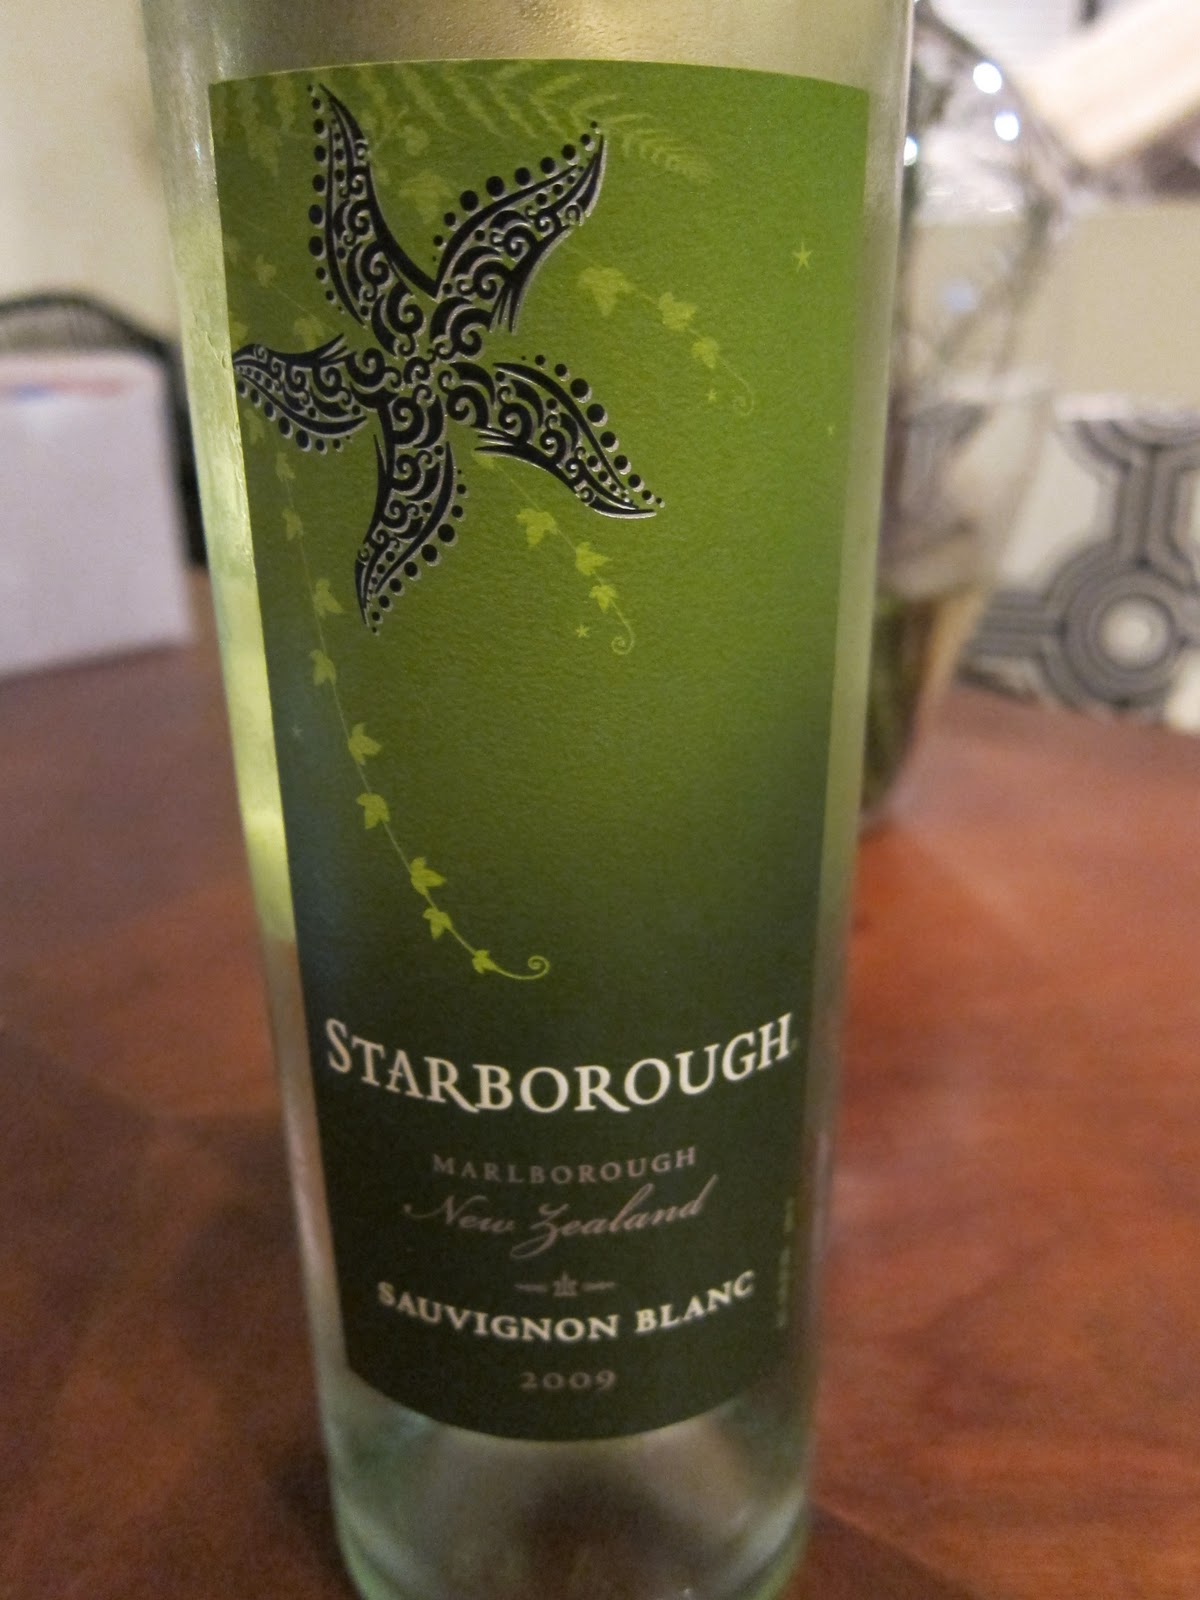
I paired my meal with this wonderful and wallet-friendly Sauvignon Blanc from New Zealand. At $12.99 a bottle, it delivers everything a Sauvignon Blanc should, and more!


Dinner is served!


R

Tuesday, March 8, 2011

I LOVE HOUSTON

Hey y’all!  I’m back from Houston!  If you haven't yet been, you should definitely plan a trip.  There's so much to see and do and it was a blast.
Thanks, Katie, for lending me your beautiful cowboy hat!  Yeehaw!

 I went to my first rodeo held at Reliant Park,

watched mutton busting (similar to adults riding a bull except that mutton busting involves kids holding on to a lamb right out of the gate), saw Janet Jackson in concert, 
she looked great and so did her cleavage!
scored my first pair of cowboy boots, 


ate authentic Texas BBQ at Goode Company BBQ
Goode's had the longest line
5 different kinds of sausage on top of smoked turkey and brisket, with a side of beans, jalapeño cheese bread, and a deep fried meatball
deep fried bacon!

washed it down with some beer,


and discovered Frito Pie (thanks Liane and Raquel)! 
my version
The authentic version
When I yelped Goode Company BBQ, they had the most reviews and I was told it was one of the best BBQ restaurants in town.  So if you find yourself in Houston, that should be a good enough sales pitch to get you into Goode's. I do regret not having cornbread though.  What was I thinking?!  I guess I didn't exactly need more carbs after that Frito pie.  Or the deep fried bacon.

My goal now is to break in my gorgeous new cowboy boots, so I’ll be wearing them practically everyday.  And hopefully walking a LOT to burn off the extra weight I put on after that trip!  

M

Monday, March 7, 2011

MY LITTLE GARDEN

Growing up, I was lucky enough to have a full vegetable garden in my backyard. Thanks to my dad’s green thumb we had everything; grapes, blueberries, squash, rhubarb, tomatoes, snap peas, potatoes, zucchini, carrots, onions, peppers, strawberries, lettuce, corn, pumpkins—you name it, we had it. It was something I took for granted and now I really miss having. Unfortunately, I don’t have a big backyard so I have to make do with what apartment living offers me. A decent sized balcony.

As an avid Sunset Magazine reader, I have found myself glued to the gardening section the past couple of issues dreaming of what type of vegetables and flowers I would grow in my garden. I was pleasantly surprised to find all sorts of tips and tricks for gardening in small spaces on their website here. I was sold! I decided to start my own little garden on my balcony.

Saturday morning, I headed out to the nursery and became completely overwhelmed when I saw the amount of different plants, flowers and vegetables to choose from. Since I am really limited on space and since this will be my very first garden of my own…I wanted to keep things simple. I decided on tomatoes, an assortment of herbs, and some flowers. There were shelves and shelves of all sorts of different tomatoes with all different names so I called my dad for help. I learned there are two types of tomatoes, determinate and indeterminate. Determinate tomato varieties tend to reach a fixed height and ripen all their fruit in a short period of time. Indeterminate, also referred to as "vining" tomatoes, will continue to set and ripen fruit until killed off by frost. I went with an indeterminate variety called Sweet 100 which are a type of cherry tomato…the more tomatoes, the merrier! For my herbs, I decided on Rosemary, Cilantro, and Basil. As for flowers, I went with a Lavender plant, two Ranunculus plants, yellow Daisies, and Calendulas. This where I got stuck. I didn’t like any of the gardening pots the nursery had to offer, so I decided to go ahead with my purchase of all of the above plants and find my pots elsewhere.

To make a long story short, I still have not found any pots that I like! The Rose Bowl Flea Market is this coming Sunday, so I plan on trying out my luck there. You can almost make anything a garden pot, as long as you have a hole drilled in the bottom for proper drainage. So, I figure I can get pretty creative with this project…wish me luck!

Here’s a picture of all my pretty picks I brought home with me from the nursery.


R

Friday, March 4, 2011

WEEKEND RECIPES


ROASTED BEET SALAD

I never knew that making salad dressing was so simple until I saw someone whip up a vinaigrette in 3 minutes.  It was very impressive.  So I’d like to share with you all how easy it is to make the balsamic dressing for a beet salad I made last night. 

Balsamic Vinaigrette:
1/4 cup balsamic vinegar
3 Tablespoons thinly sliced or minced shallots
1 Tablespoon honey
salt & pepper to taste
1/3 cup extra virgin olive oil

You can either throw all the ingredients into a blender, or you can whisk them together in a measuring cup or a glass bowl (metal bowls aren’t ideal since the metal whisk hitting the metal bowl can create a nasty metallic taste).  And that’s it!  You’ve just made a delicious salad dressing.

Now for the salad:
3 cups (roughly) baby spinach, or whatever greens you like
Balsamic Vinaigrette
6 orange wedges, skin off
1/4 avocado, sliced
dried currants or cranberries
sliced almonds, toasted
roasted beets, quartered, then cut into bite size pieces
goat cheese, crumbled

Roasting the beets will take about an hour.  You can place as many beets as you’d like in one batch, and one beet per person should suffice.  Preheat the oven to 400 degrees.  Rinse the dirt off the beets, then slice off the green stems completely, even taking off a bit of the top of the beet.  Also cut off the bottom of the beets (the tail like end) so they can sit flat on a cutting board.  Place the beets (whole with the skin on) onto a sheet of aluminum foil and season with a little salt and pepper.  Drizzle with olive oil.  Fold up the edges of the aluminum foil over the beets as if you’re enclosing the beets into a pocket.  Make sure the pocket is air tight, as this will keep the steam in and the beets moist when roasting.  Place on a baking pan or dish and into the oven they go.

After an hour, take the beets out of the oven and open the aluminum foil pocket carefully, as the hot steam will burn you!  Allow a cooling time of about 15 minutes so you can peel off the skin by hand.  The red beets stain, so you may want to use gloves or paper towels for this task.  After you’ve peeled and chopped them, mix a little of the balsamic vinaigrette onto the beets so you pre season them.  They are now ready to go!

Back to the salad.  Dress the greens with as much dressing as you like, then I suggest constructing your salad in the order written above, with goat cheese being the last ingredient that goes onto your plate.  This makes for a pretty salad which went well with my rotisserie chicken.

I’d also like to share that a rotisserie chicken at your neighborhood Pavilions or Ralphs is only $5.99!!!  At Bristol Farms and Whole Foods, that price jumps to $9.99.  Why must you, person in charge of pricing inventory at gourmet supermarkets, make your rotisserie chickens so much more expensive?

And let’s be honest, bottled salad dressings never taste as delicious as restaurant or freshly made dressings, so after I became confident in my dressing making abilities, I threw away all the Newman’s Own, Ken’s, Annie’s Naturals, and Kraft bottles in my fridge, and now I have so much more free space. If only I only knew how to make more room in my overstuffed closet! 

M


******************************************************
THE  WEEKEND

I’m off to pack for a weekend in Houston where I’ll be going to my first ever rodeo with a big group of friends.  YEEHAW!  I may even buy a pair of authentic cowboy boots.  And I may have to have some BBQ as well!  I’m excited because this will be a weekend of firsts and my friends are flying in from all over the US.  I’m expecting to overeat and may even go for a hangover.  The flight back to LA on Sunday should be a real doozie.

M


GREEK YOGURT WITH POMEGRANATE AND HONEY

Reasons why this is my new favorite dessert/snack/breakfast
  1. It’s healthy
  2. It’s extremely easy to make
  3. It tastes really good

Usually, after I finish dinner I want something light and sweet to snack on. Kettle corn, a scoop of ice cream, a cookie…these are the usual suspects as I’m really not a huge dessert person. Yes, I know yogurt with fruit and honey isn’t exactly a groundbreaking combination, but it’s something I usually only eat for breakfast. So, when I switched it in for dessert and added pomegranate seeds to the mix…it totally changed the way I feel about it. I LOVE IT.

Recipe:

4 servings

2 cups of Greek Yogurt
3/4 cup of pomegranate seeds
1 Braeburn apple (chopped)
1 ripe mango (chopped)
4 teaspoons of honey

Place ½ cup of greek yogurt in four separate bowls. Top each with 3 tablespoons of pomegranate seeds. Evenly divide the chopped mango and apple into the four bowls. Lightly drizzle a teaspoon of honey to top the fruit in each bowl. (add ½ teaspoon more if you like it extra sweet)

To really put it over the edge, place in the freezer for 5 minutes before serving! Enjoy!

R

****************************************************


THE WEEKEND...
My plans for the weekend involve a vegetable garden. Now is the time to plant, right? I’m going to test out my thumb and see how green it is. Will let you know on Monday…


R

Thursday, March 3, 2011

JUICY. PORK. DUMPLINGS.

Din Tai Fung Dumpling House is located in the San Gabriel Valley which is a little bit of a drive from Los Angeles, but oh so worth it! One thing I would recommend is definitely going at an “off” hour because there is almost always a long wait. In my opinion, the perfect time to go is around 3 on a lazy Sunday afternoon. It’s the perfect way to cap off the weekend.


This is why it is absolutely worth the drive: the Juicy Pork Dumplings. How they are able to pack so much flavor, tender pork, and warm broth into a tiny dumpling is a mystery to me. You have to eat the whole dumpling at once; otherwise you miss out on the best part…the explosion. I am talking about the party of flavor and textures that happens when you take your first bite. You don’t want to lose a drop of the warm broth which is why you want the whole dumpling inside your mouth when you bite down and that broth comes bursting out. (insert dirty joke here, Maya)


Other great dishes I tried: appetizer, shrimp & pork wanton soup, shrimp & pork shaomai, and steamed pork bun

Original location Taipei City, Taiwan.

R

Wednesday, March 2, 2011

WHY RECYCLING TASTES SO DELICIOUS

The great thing about spending so much time on a Sunday feast is that you can take a break from cooking until Wednesday and just heat up leftovers.  Of course, you can always find a decent place from where to order takeout, after all, it is LA.  But I like home cooking because nobody will put more love into your food than you will.   And who doesn’t love pancakes for breakfast??  I used the blini mix from Sunday for today’s breakfast.


For dinner last night (while Rachel was at her house dining on those mouthwatering Sweet and Spicy Chicken Wings), I shredded up a duck leg, boiled some garganelli (similar to penne but more delicate and, in my opinion, tastier), tossed all of that in with the peppers, along with a thin slab of butter, sprinkled some parmesan and parsley, and voila, Pasta ala Leftovers!  I also made a simple salad with a lemon vinaigrette. 


And I’m embarrassed to disclose that I can eat the same thing for three, sometimes four days in a row.  The guy at the noodle place near my house knows my order before I even speak (he has caller I.D.), and I can hear in his voice the pleasure our little game of "guess what I'm going to order" gives him.  Should I be embarrassed and dial *67 next time?  Am I over thinking this?  

M