Thursday, March 31, 2011

ELEVEN MADISON PARK in NY

While I was perusing my iPhoto library, deciding which photo of my dog I wanted to save as my new iPhone wallpaper, I came across so many food pictures. Between the adorable pictures of my sweet little Stella, and the mouth watering food pictures, I must've been lost in iPhoto for a good thirty minutes.

So Rachel and I only started our food blog on Valentine's Day this year, after we had talked about it for a few months.  Well, turns out I have food photos taken from 10 years ago.  My point is, I've always loved taking photos of my meals.  Especially epic meals.  And what better place than Eleven Madison Park to post for today.  Everyone kept telling me I was so talented at photographing food.  This outing to Eleven Madison Park has to be the créme de la créme of all of my food pictures.  

It was a beautiful autumn day in NY, the bright, airy layout of EMP (that's what regulars call it) with impossibly high ceilings, and windows to match, let in the perfect amount of light.  I, along with the five others at my table, were completely in awe and giddy with excitement when our first course arrived. Being half Japanese, I felt at home with a camera in hand, batteries fully charged, ready to document the following 3 hour lunch we were treating ourselves to.


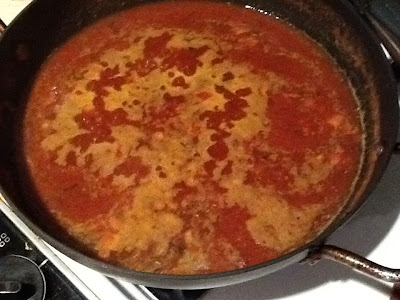
A very dainty consommé with flaky, paper thin crisps sprinkled with a little cayenne pepper. 

Roasted Beet Salad with Goat Cheese
Forgive me, for I didn't write down what any of these dishes were because at the time, I didn't have a blog.  I was just taking these pictures out of pure amusement coupled with the disbelief that I was being presented with dishes fit for kings and queens.  If Daniel Humm, the Executive Chef at EMP, would have come out to our table, I probably would've bowed down to him.

Liver Paté Mille Feuille with a Raspberry Sauce
This Liver Paté is my most favorite food picture ever.  There's something so delicately beautiful about this dish.  The colors and textures I find to be so alluring and sexy.  I can actually taste the flavors as my eyes make their way around the plate.  This, to me, is food porn.

Lobster with Seared Foie Gras

Whole Roasted Muscovy Duck with Lavender
Muscovy Duck
I can't tell you how flawless every course of this most memorable meal was. I looked around at the other patrons, wondering if they came here on a regular basis.  They were just chit-chatting and going on as if this were a normal day. Was I the only one who felt extremely special?  I thought, if I ever tire or lose appreciation for a culinary experience this divine...please someone, shoot me.  
"Cheese & Crackers"
I wonder just how many people it takes to assemble all of these gorgeous dishes.


A Snow Dusted Cloud of Ice Cream in a Blanket of Honey
I would be just as happy with a Heath Klondike Bar for dessert.  I'm just saying...I love the Heath Klondike Bar.

Ice Cream Plate with Fruit and Meringue
We were able to sneak into the kitchen, since we finished lunch at 4pm and there was a lull in serving customers.  It was the perfect time to snap a few pictures behind the scenes of the master cooks that made our dining experience at Eleven Madison Park one that I will never forget.  

Preparing small dishes of butter for dinner guests

Still bustling at 4pm!

Thank you, Jon, for taking us to your regular spot, EMP (yes, the same Jon who once stated he didn't eat any green vegetables).  When we go back to NY, I'd love to do Epic Meal Part Deux!

M


Wednesday, March 30, 2011

PEACH AND PROSCIUTTO

I’m usually not into using fruit in savory dishes, but since I had a few peaches lying around along with some leftover prosciutto and mascarpone cheese, I took a chance and decided to make some little sandwiches combining the the three. I wound up pleasantly surprised with my end result; lovely little sandwiches dainty enough to serve at a tea party, but delicious enough to serve as an appetizer at a BBQ.


Grilled Peach & Prosciutto Sandwiches with Mascarpone Cream and Basil (makes 16)
1 cup mascarpone cheese
1 skinny baguette (sliced into 16 one half inch rounds)
2 large ripe peaches, cut into sixteen ¼ inch slices
8 thin slices of prosciutto, torn in half and folded
16 fresh basil leaves


Preheat grill to medium.


Place bread rounds on grill along with peach slices. Grill bread 1-2 minutes on each side. Grill peaches 2-3 minutes on each side until very lightly browned.


Lay out sliced baguette rounds on a large platter. Spread mascarpone on each bread round evenly. Fold a piece of prosciutto and place on top of mascarpone. Top with a basil leaf and a slice of grilled peach. Serve immediately.


R

Tuesday, March 29, 2011

AVOCADO ENCHILADAS

Holy moly these are good!!!

This is a recipe I discovered from an older cookbook by Martha Stewart. It definitely does not disappoint. You can substitute the chicken stock for vegetable stock and this makes a wonderful vegetarian dish.

AVOCADO ENCHILADAS (serves 12 to 14)
2 dried ancho chiles
4 cups plus 1 tablespoon vegetable oil
1/2 medium onion, diced
2 cloves of garlic, minced
2 tablespoons brown sugar
5 tablespoons ground cumin
2 tablespoons dried oregano
2 cups white wine
1 twenty-eight ounce can crushed tomatoes
2 cups chicken stock (if vegetarian, substitute vegetable stock)
8 Haas avocados
1/4 cup freshly squeezed lime juice
1/4 teaspoon salt
1/4 teaspoon pepper
25 corn tortillas
1 1/2 pounds grated cheese (I like to mix jack and cheddar)

1. Place the chiles in a saucepan and cover with water. Bring to a boil. Reduce the heat and simmer 5 to 10 minutes. Cool slightly, remove stems, and purée the chiles in a food processor.

2. Heat 1 tablespoon of the oil in a deep skillet over medium heat. Add the onion, garlic, brown sugar, cumin, and oregano. Sauté until onion is soft, 4 to 5 minutes. Add wine, chile purée, tomatoes, and stock. Simmer 20 more minutes until stew consistency.


3. Peel, pit, and roughly chop the avocados. Toss with cilantro, lime juice, salt and pepper.

4. Heat oven until 400 degrees. Heat remaining 4 cups of oil in a wide saucepan until very hot but not smoking. Using tongs, fry 6 tortillas one at a time for 2 to 3 seconds. Blot on paper towel.

5. Dip fried tortillas in chile sauce to lightly coat both sides. Spoon 2 tablespoons of the avocado filling onto each torttilla and roll up. Spread 1/2 cup of chile sauce on the bottom of a large deep casserole. Arrange rolled tortillas in casserole so they fit snugly. Repeat entire process, covering the bottom of the casserole. Pour 1 cup of sauce over the tortillas and sprinkle with half of the cheese. Make a second layer using remaining ingredients. Top with remaining sauce and cheese. 

6. Bake enchiladas until heated through, 25 to 30 minutes. Serve immediately!


The chile sauce is slightly spicy and sweet, but the creamy lightness of the avocado cuts right through the sauce and makes for a fantastic combination. Whether you are a vegetarian or not, I guarantee you will love these enchiladas.

Hope you love them as much as I do!
 
  R

Monday, March 28, 2011

JAPANESE BENTO BOXES


My good friend in Tokyo, Howard, recently sent me an email with some really entertaining pictures that I wanted to share.  Below are pictures of the lunches of some very lucky elementary school children in Japan.  It looks like some people have a lot of time on their hands.  Speaking of having some time on my hands, I just organized my spice drawer in alphabetical order.


I found this American version of the Japanese bento:

photo

When I went to school here in the states, I saw a lot of plain sandwiches in brown paper bags.


Instead of the deliciously carby peanut butter & jelly sandwich, my mom liked to pack me turkey sandwiches with mustard.  She was super cute because she'd pack lettuce and sliced tomato in a separate ziploc so the bread wouldn't get soggy by the time I was able to eat my lunch.  

Dear Mom, I know a simple "Thank you, Mom" doesn't cut it for all the sleep lost every morning when you made me some sort of hot breakfast before school, as well as a bagged lunch.  Oh yeah, and dinner too.  But I just want you to know that I am sooooooo thankful for all the delicious food you made for me growing up.  I really lucked out because you're such an amazingly talented cook.  You helped me fall in love with so many different cuisines with the variety of meals you prepared, and now, as an adult, I have a tremendous appreciation for the time and effort that goes into each dish.  Much love and hugs.

M

Friday, March 25, 2011

"EAT YOUR VEGGIES!"

Dear Jon,

This post is for you.  And for the rest of you, Jon is my friend who refuses to eat anything green.  Absurd, right?!

I'm sure you heard your parents say "Eat your veggies!" way too many times growing up.  It's difficult sometimes to take a liking to vegetables you absolutely hated as a kid.  I swore off brussel sprouts when I was 7.  I had only known them to be steamed and served with Japanese mayonnaise. Eww, right?  My mom and dad loved it (sorry mom and dad if you're reading this).  
Then one day, about 5 years ago, I was at a restaurant and someone ordered roasted brussel sprouts.  My world became a happier place knowing that this poor vegetable that I had shunned for most of my life, was actually, not horrible at all!  It has become, to my surprise, one of my favorite vegetables. The lesson here is that it's all about the preparation.

You'd think now I'd post a Roasted Brussel Sprout recipe.  I'll save that for another day.  Today, I'm going to try to convince all the veggie haters to be more open about incorporating otherwise unappetizing vegetables into their diet.  

I ordered a chopped salad at the Chateau Marmont (free valet during lunch with validation) the other day and found the pieces of steamed cauliflower in my salad to be super delicious.  Immediately after lunch, I went to the grocery store and loaded up on vegetables, blue cheese, and chicken.  And going to the market on a full stomach will save you money.  I was surprised at how many items I was able to walk past and not throw in my basket!  

For lunch the next day, I was pleased with the extremely healthy and colorful salad I made.  Yes, it took some time preparing each vegetable, but you can steam a batch of veggies, then keep them in your refrigerator to throw on other salads you might make later in the week.  And thank you, Elena, for posting the Balsamic Dressing you make at home.  I made it and it was amazing; refreshing and the perfect blend of sweet and savory.  I've reposted your recipe below so everyone can enjoy it!


Ingredients to cook:


2 Boneless Skinless Chicken Breasts - Season chicken breasts with olive oil (a generous amount to keep chicken moist), salt, pepper, and garlic (optional).  Place on foil lined baking dish and place in a 400 degree F oven for 10 minutes.  Using tongs, very carefully turn chicken over, then continue to roast for 15 more minutes.  Take out of oven and test for doneness.  Depending on the thickness of your chicken breasts, you may need to roast for 5 more minutes.

Broccoli - steam for 30 seconds, then immediately transfer to an ice bath to prevent further cooking.

Cauliflower - steam for 3 minutes, transfer to ice bath.

Green Beans - steam for 2 minutes or so, ice bath.

Beets - I bought the Trader Joe's brand pre-roasted beets.  But you can roast raw beets in the oven for an hour at 400 degrees F.

Baby Carrots - I tossed the raw carrots in olive oil, salt, pepper and a little rosemary, threw them on a baking sheet in the oven at 400 degrees F for about 5-6 minutes.

The rest of the vegetables can be eaten raw: cherry tomatoes, avocados, green apples, butter lettuce w/ radicchio.  

I chopped all of the vegetables into bite sized pieces and tossed them in Elena's Balsamic Dressing:

3 Tbsp Balsamic Vinegar 
2 tsp Dijon Mustard 
2 tsp grated Ruby Red Grapefruit peel (I used 2 Tbsp Orange Juice because I   didn't have any grapefruits or oranges)
2 tsp grated Orange peel 
1 tsp Honey 
1/3 Cup Olive Oil

After plating the salad, I sprinkled some raw walnut pieces and blue cheese crumbles, then topped with diced roasted chicken.  Clean, colorful and full of texture and flavor.  Bon appetit!

M

Thursday, March 24, 2011

VIN CHAUD


A couple years ago, Maya and I were lucky enough to spend Christmas in Paris (neither of us had been before). It was an amazing trip--except it was FREEZING out. The fountain outside the Louvre was completely frozen over and I even rocked tights under my jeans every day. But it didn't matter because after our first day there, we discovered Vin Chaud. Vin means wine in french, and chaud means hot. Translation: hot wine. So after walking around all day our first day there, our hands, noses, and cheeks numb, we decided to take a break in a small cafe. We immediately established with our server that we wanted something to warm us up. He smiled and assured us he had just the thing. Did he ever! I took my first sip and was in heaven. Spiced with cinnamon and nutmeg, sweetened with brown sugar, and topped with a slice of lemon--it warmed me to my toes.

the first time we tried the delicious drink in Paris
 Ever since that trip, whenever it's cold out and I want that warm and cozy feeling, I make Vin Chaud. It never misses and it's a surefire crowd pleaser. Seeing as how the weather here in L.A. has been dreary, gloomy, and cold lately--I can't think of a better time to make Vin Chaud.

VIN CHAUD
1 bottle of red wine (i prefer a dry red wine)
1/2 cup brown sugar
1 stick cinnamon
1 teaspoon freshly ground nutmeg
1/4 teaspoon ground cloves
1 lemon, zested

Heat the wine, brown sugar, cinnamon, ground nutmeg, and cloves in a pot over medium heat. Stir occasionally until it simmers and a foam forms. Remove from heat. Add the lemon zest and stir, let sit for 2 minutes. Pour wine through a strainer into stemmed wine glasses or a cup/mug with a handle while hot. Add a slice of lemon to each glass and serve.

Hope it warms you to your toes like it did to me!

R

Wednesday, March 23, 2011

THE FLU...BOOO.

Being sick is never fun.  Especially when it's the stomach flu.  I often joke about wanting this awful bug so I can lose a few lbs, usually post vacation, when I have to reacquaint myself with portion control.  Well...I will never wish for the stomach bug again, because I had forgotten just how horrible every waking minute is.  I'll spare you the details.  

So after I was feeling better, I decided to make a pot of Okayu, which is a Japanese porridge, made with rice and water.  It's very easy on your stomach and terribly bland, which is perfect for when you're sick.  My mom would always make it for me when I was sick, so aside from being easily digestible, it's somewhat of a nostalgic dish for me.  Since I'd stocked up at the Japanese market last week, in my refrigerator were the Japanese pickles that were just waiting to be served with the Okayu.  Oh yeah, and the garnish of dried anchovies and salmon (Chirimen Sake - pronounced sha-keh in this case) drizzled with about 1/2 teaspoon of soy sauce.


The saltiness of the pickled vegetables are offset by the blandness of the porridge.  I know it can be an acquired taste, but since I grew up with it, I absolutely love it.  I was so glad to have made the trip to Nijiya Market.

Okayu Recipe:

1/2 cup Japanese rice
3 cups water
1/2 teaspoon salt

Rinse the Japanese rice once and drain.  Place rice and water into a pot.  Not to brag, but I have a rice cooker, so I just hit "cook" and I'm done.  You guys, with the regular pots, will want to bring the rice and water to a boil over medium heat, covered, leaving a little room for steam to escape.  After the water comes to a boil, turn down the heat to low and simmer, partially covered, for 35-40 minutes.  Add salt before serving.  I paired the Okayu with my favorite pickled vegetables:

Back row from left: Pickled Radish (Hinata) in salt, sugar and vinegar.  Pickled Turnip (Hinona) and Ginger (Myoga) in salt, soy sauce, sugar, vinegar and mirin (Japanese sweet rice wine).  Pickled Plum (Umeboshi).  Front row: Japanese cucumber pickled at home for 45 minutes by washing, then rubbing generously with salt, then wrapping in aluminum foil.  To serve, wash off salt, then slice into 1/2 inch thick bites.  Baby Burdock (Yama Gobo) pickled in soy sauce.


I understand these pickled vegetables can be very foreign to most of you, but they're so common in Japanese culture.  And if you don't like Okayu, I know you'll like Miso Soup because who doesn't!  You can make Miso Soup with many different ingredients.  I used wakame (seaweed) and tofu with green onions and mitsuba (Japanese parsley) as a garnish.  


I looked online and realized Miso Soup variations can be taken to another level, as it was here.  Very impressive!

And last, but not least, a Japanese meal is not authentic if you don't have green tea to sip on!  When choosing green tea at Nijiya, and you can imagine they have a ridiculous assortment of brands and types, I came upon a brand, Yamamotoyama.  Long word.  The selling point wasn't the gorgeous cup of tea pictured on the package.  It was the "Special Occasion" part that got me.  This box was $6.49 and the box beside it was $5.29 and it didn't say "Special Occasion."  I thought to myself, "I want to feel special every time I drink green tea!."  In the 20 seconds it took me to make my decision, I imagined I'd bought the cheaper tea to save a buck.  I even went insofar as to, in my mind, boil the water and place the tea bag in my cup. What I concluded was that every time I'd go to make the $5.29/box tea, I'd be thinking how much better the Special Occasion tea would taste.


It was worth every extra penny.  This tea is delicious.  They weren't kidding.  And now I feel a hundred times better, thank you for asking.  I never want the stomach flu again, but I will be having Okayu (or regular rice) often this week since the pickled vegetables need to be consumed!  

Remember to take your vitamins so you don't get sick.  And if you feel off, I personally feel better by taking Wellness Formula vitamins (in tablet form).  They taste gross, but help your immune system.  Stay healthy!

M

Tuesday, March 22, 2011

GRILLED PIZZA

Before the crazy monsoon/rain storm hit Los Angeles, I cooked up some amazing pizza using my gas grill. I had heard that cooking pizza on a grill gives it an extra crunchy, flavorful, and light texture, so I decided to give it a try. Since it was my first time, I read up as much as I could on how to cook it properly so I wouldn’t end up with pizza dough stuck to my grill or a black charred pizza crust.

A recipe that really jumped out at me was this one by Bobby Flay.


INGREDIENTS
1/2 pound Italian hot sausage
1 large red onion, cut into 1/4-inch thick slices
2 large yellow pepper, cored, seeded and quartered
2 large red pepper, cored, seeded and quartered
Olive oil
Salt and pepper
2 packages of prepared pizza dough
1/2 pound grated fontina cheese
3 garlic cloves, minced
1 cup ricotta
2 tablespoons extra-virgin olive oil
2 tablespoons chopped fresh oregano
1/2 cup fresh basil leaves
1/4 cup white wine vinegar
1 tablespoon honey
Salt and freshly ground black pepper
1/2 cup olive oil

Instead of making my own pizza dough, I bought Trader Joe’s pre-made pizza dough. (which is really great) I wanted four individual pizzas, so used two packages of pre-made dough. I removed it from it packaging, dusted a flat surface with flour, and cut each ball of dough in half so I had 4 evenly sized balls of dough. I then let them rise for about 30 minutes-leaving them untouched.


While my dough was rising, I cooked up all my toppings for the pizza. First, preheat your grill to medium. Grill the sausage on both sides until golden brown and cooked through, about 10 minutes per side. Brush onions and peppers with the oil and season with salt and pepper. Grill the onions and peppers until soft, about 3 to 4 minutes per side. Remove the sausage from the grill and slice into 1/4-inch thick slices. Remove the onions, separate into rings, and roughly chop. Remove the peppers and slice into 1/8-inch thick slices.

Next, mix together the ricotta, extra-virgin olive oil, and oregano in a small bowl and season with salt and pepper, to taste. Set aside. For the Basil Vinaigrette, combine basil leaves, white wine vinegar, honey, salt, pepper, and olive oil in a blender or food processor. Blend until smooth. Set aside.

Returning to the pizza dough, now that it has had time to rise, you want to knead it and flatten into ¼ inch thick pizzas. It’s ok if they don’t make a perfect circle (mine didn’t) just try to make sure they are an even thickness all the way around. I turned two baking sheets over and dusted them with flour, and placed my prepared pizza dough on top. I then brushed the top with olive oil and seasoned with salt and pepper.

Oil your grill grates and set the grill on med-high. The next step sounds kind of tricky, but it’s actually really easy. Grab the side of the pizza dough farthest away from you, lift, and fling it on the grill so that the side with the olive oil is facing down. Let cook for 3 minutes, then flip. This is important: let cook for only 1 minute on this side, no more than that, then take off the grill and put back on flat surface. (I used my upside down cookie sheet again). Lower grill heat to medium-low. You don’t want to fully cook the bottom of the pizza, as you are going to be putting it back on the grill and it will have time to cook then.


Brush the pizzas with olive oil and minced garlic. Then top with fontina cheese. Divide the sausage, peppers, and onions over the four pizzas. Place pizzas back on the grill over medium/low heat and close lid. Leave for 3 minutes until cheese has melted. Remove from heat. Top with a dollop of ricotta topping and lightly drizzle with basil vinaigrette.

This pizza was a HUGE hit. The grill made it extra crispy and flavorful-just the way I like it. Now that I know how easy it is, I plan on making lots more “grilled pizza” especially with summer just around the corner. The combination of toppings you can do are endless…I can’t wait to try all of them out!


R